Android app development has become one of the most popular skills in the technology industry. Millions of developers around the world use Android Studio to create mobile applications, games, productivity tools, and business apps for Android devices. Whether you want to become a professional Android developer, create your own mobile applications, or learn app development as a hobby, installing Android Studio is the first and most important step.
Android Studio is the official Integrated Development Environment (IDE) developed by Google for Android application development. It provides powerful tools for coding, debugging, UI design, testing, and app performance optimization. Since Android Studio is officially supported by Google, it receives regular updates, security improvements, and compatibility support for the latest Android versions.
For beginners, the installation process may initially appear complicated because Android Studio requires multiple components such as SDK tools, emulators, Gradle configurations, and system requirements. However, once everything is configured properly, Android Studio provides a smooth and professional development environment for building Android applications efficiently.
One of the biggest advantages of Android Studio is its flexibility. Developers can create applications using Java or Kotlin programming languages, connect Firebase services, integrate AdMob advertisements, and test applications on both emulators and real Android devices. This makes Android Studio the central platform for modern Android development.
In this complete guide, you will learn how to install Android Studio on Windows step by step. We will cover system requirements, downloading Android Studio, installation setup, SDK configuration, emulator setup, and common troubleshooting tips. By the end of this tutorial, your Windows computer will be fully ready for Android app development.
1. What is Android Studio?
Android Studio is the official software development environment for creating Android applications. It is based on IntelliJ IDEA and includes specialized tools designed specifically for Android app development. Google officially recommends Android Studio for building Android applications because it provides direct support for the latest Android APIs and development tools.
The software includes everything developers need to create professional Android apps. This includes a powerful code editor, XML layout designer, Android emulator, debugging tools, Gradle build system, performance monitoring tools, and testing frameworks.
Android Studio supports both Java and Kotlin programming languages. While Java was traditionally the primary language for Android development, Google now officially recommends Kotlin because of its modern syntax and improved productivity features. However, beginners can choose either language depending on their learning preference.
One important feature of Android Studio is the Android Emulator. This allows developers to run virtual Android devices directly on their computers without requiring physical smartphones for testing. Developers can simulate different Android versions, screen sizes, and hardware configurations using the emulator system.
Android Studio also integrates smoothly with important Google services such as Firebase Authentication, Firebase Realtime Database, Google Maps API, and AdMob monetization systems. This makes it easier for developers to create cloud-powered and monetized Android applications.
If you are planning to build Android apps with user login systems, you may also like our article on How to Connect Firebase Authentication in Android Studio.
2. Minimum System Requirements for Android Studio
Before installing Android Studio, it is important to verify whether your Windows computer meets the minimum system requirements. Android Studio is a powerful development environment and requires sufficient hardware resources for smooth performance.
For Windows installation, Google generally recommends using Windows 10 or Windows 11 operating systems. Older versions of Windows may still work, but compatibility and performance can become unstable over time.
The minimum RAM requirement is typically 8 GB, although 16 GB RAM is strongly recommended for smoother performance, especially when using Android emulators. Low RAM systems may experience lag, freezing, and slow Gradle build times during development.
Storage space is another important factor. Android Studio itself requires several gigabytes of storage, but SDK packages, build tools, and emulator images can consume much more space over time. Developers should ideally keep at least 20–30 GB of free storage available.
A processor with virtualization support is recommended for running Android emulators efficiently. Intel VT-x or AMD-V virtualization technologies significantly improve emulator speed and stability. Developers should also enable virtualization from BIOS settings if necessary.
Using SSD storage instead of traditional HDD storage can dramatically improve Android Studio performance. Faster storage reduces project loading times, Gradle build delays, and emulator startup times.
3. Downloading Android Studio


The first step in the installation process is downloading the latest version of Android Studio from the official Google website. Downloading from official sources is extremely important for security and compatibility reasons.
Open your web browser and visit the official Android Developers website. Navigate to the Android Studio download section and select the Windows version installer. Google regularly updates Android Studio with new features and bug fixes, so always download the latest stable version.
The installer file size is usually several hundred megabytes, depending on included SDK components and installer packages. Internet speed may affect download time significantly.
Before starting the download, carefully read the terms and conditions provided by Google. Once accepted, the installer will begin downloading automatically.
After the download is complete, locate the installer file inside your Downloads folder. The file usually has a name similar to:
android-studio-2026.exe
Downloading the correct installer version is important because unofficial modified installers may contain malware or outdated SDK packages. Always use trusted official sources for development software.
4. Installing Android Studio on Windows
Once the installer file is downloaded, double-click the setup file to begin the installation process. Windows may display a security confirmation prompt asking whether you want to allow the application to make changes to your system. Click “Yes” to continue.
The Android Studio Setup Wizard will now appear. Click “Next” to proceed through the installation steps. During installation, Android Studio may ask whether you want to install additional components such as:
- Android SDK
- Android Virtual Device (AVD)
- Performance Emulator Tools
It is recommended to keep all default components selected because these tools are necessary for proper Android app development and emulator functionality.
Next, choose the installation directory for Android Studio. Most beginners can safely keep the default installation path. However, developers with limited system drive storage may choose a different drive location.
The setup process will then begin copying files and configuring development tools. Depending on system performance and internet speed, installation may take several minutes.
After installation completes successfully, Android Studio will prompt you to launch the application immediately. Enable the “Start Android Studio” option and click “Finish.”
5. Setting Up Android SDK
After launching Android Studio for the first time, the setup wizard will guide you through SDK configuration. Android SDK (Software Development Kit) contains essential libraries, platform tools, APIs, build systems, and emulator packages required for Android app development.
The setup wizard usually provides two installation modes:
- Standard Installation
- Custom Installation
Beginners should generally select “Standard Installation” because it automatically installs recommended SDK packages and emulator tools.
Android Studio will then begin downloading required SDK components from Google servers. This process may take time depending on internet speed because SDK packages can be several gigabytes in size.
The SDK Manager inside Android Studio allows developers to install additional Android versions later if needed. Different Android devices use different API levels, so developers often install multiple SDK versions for testing compatibility.
Proper SDK setup is essential because Android Studio depends on SDK tools for compiling applications, running emulators, and generating APK files.
If you are interested in monetizing Android apps later, you may also like our guide on Best Ad Placement Tips for Mobile Apps.
6. Creating Your First Android Project
Once Android Studio and SDK setup are complete, you can create your first Android application project. This step verifies that the installation was successful and helps beginners understand the basic project structure.
From the Android Studio welcome screen, click “New Project.” Android Studio will display multiple project templates including:
- Empty Activity
- Basic Activity
- Navigation Drawer Activity
- Bottom Navigation Activity
For beginners, the “Empty Activity” template is the best choice because it provides a clean starting point without unnecessary complexity.
Next, enter your project name, package name, and save location. You can also choose between Java and Kotlin programming languages. Beginners familiar with Java may start with Java, while modern Android developers often prefer Kotlin.
Select the minimum Android SDK version according to your target audience. Lower SDK versions support more devices but may limit access to newer Android features.
After clicking “Finish,” Android Studio will generate the project structure automatically. The Gradle build process may take several minutes during first-time project creation.
Successfully creating your first project confirms that Android Studio is installed correctly and ready for development.
7. Setting Up Android Emulator
Testing applications is an important part of Android development. Android Studio includes the Android Emulator, which allows developers to simulate Android devices directly on their computers.
To create an emulator, open Android Studio and navigate to:
Tools → Device Manager
Click “Create Device” and select a device model such as Pixel, Nexus, or Samsung-style configurations. Developers can choose screen sizes and hardware specifications according to testing requirements.
Next, select an Android system image. This represents the Android version installed on the virtual device. Android Studio may download additional emulator packages during this step.
Once configured, click “Finish” to create the emulator. Starting the emulator may take time during first launch because Android Studio initializes virtual hardware components.
Emulators are useful for testing app behavior, UI layouts, performance, and compatibility without requiring physical smartphones. However, developers can also connect real Android devices using USB debugging for more accurate testing.
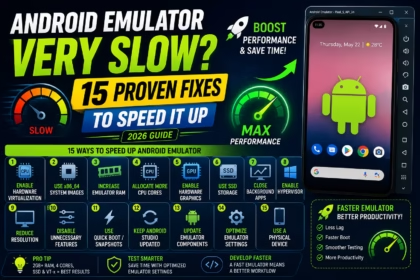
Enabling hardware acceleration and virtualization significantly improves emulator performance. Developers experiencing slow emulators should verify BIOS virtualization settings and install emulator acceleration drivers properly.
8. Common Android Studio Installation Problems
Many beginners face installation issues during Android Studio setup. Fortunately, most problems are relatively easy to solve once properly identified.
One common issue is slow Gradle build performance. This usually happens because of insufficient RAM, antivirus interference, or slow HDD storage. Using SSD storage and increasing Gradle memory allocation can improve performance significantly.
Another frequent problem is emulator lag. Developers should ensure virtualization is enabled in BIOS settings and install Intel HAXM or AMD Hypervisor drivers correctly.
Internet connection problems can also interrupt SDK downloads. Stable internet connectivity is important because Android Studio frequently downloads dependencies and SDK updates.
Sometimes Android Studio may fail to recognize SDK paths correctly. Developers can manually configure SDK locations through:
File → Settings → Android SDK
Keeping Android Studio updated is important for stability, security, and compatibility with new Android versions. Developers should regularly install official updates provided by Google.
Understanding common installation issues helps beginners troubleshoot problems confidently and continue learning Android development without unnecessary frustration.
Conclusion
Installing Android Studio is the first major step toward becoming an Android developer. Although the setup process involves multiple components such as SDK tools, emulators, and Gradle configurations, Android Studio provides a powerful and professional environment for building Android applications efficiently.
By following the correct installation steps carefully, beginners can create a stable development setup capable of handling modern Android app projects. Android Studio supports everything from simple beginner applications to advanced cloud-connected and monetized mobile apps.
Understanding Android Studio installation also helps developers become familiar with essential Android development tools such as SDK Manager, Gradle, virtual devices, and project structures. These concepts become extremely important during real-world app development.
As Android technology continues evolving in 2026, Android Studio remains the industry standard for Android application development. Learning how to use it effectively opens opportunities in freelance development, app publishing, software engineering, and mobile entrepreneurship.
The most important thing after installation is consistent practice. Building small projects, experimenting with layouts, integrating Firebase, and testing applications regularly will gradually improve your development skills and confidence over time.
Any Doubts Contact me: Contact us